


Ironing dress shirts professionally means applying the right technique, tools, and fabric knowledge to produce a crisp, wrinkle-free result that holds up through a full workday. A polished shirt signals attention to detail before you say a word in any boardroom or client meeting. Most professionals own quality shirts but undercut their appearance with rushed ironing or the wrong heat settings. The difference between a shirt that looks pressed and one that looks professionally pressed comes down to sequence, steam control, and the fabric you start with. Get those three right, and your morning routine becomes faster and your results become consistent.
What tools do you need to iron dress shirts professionally?
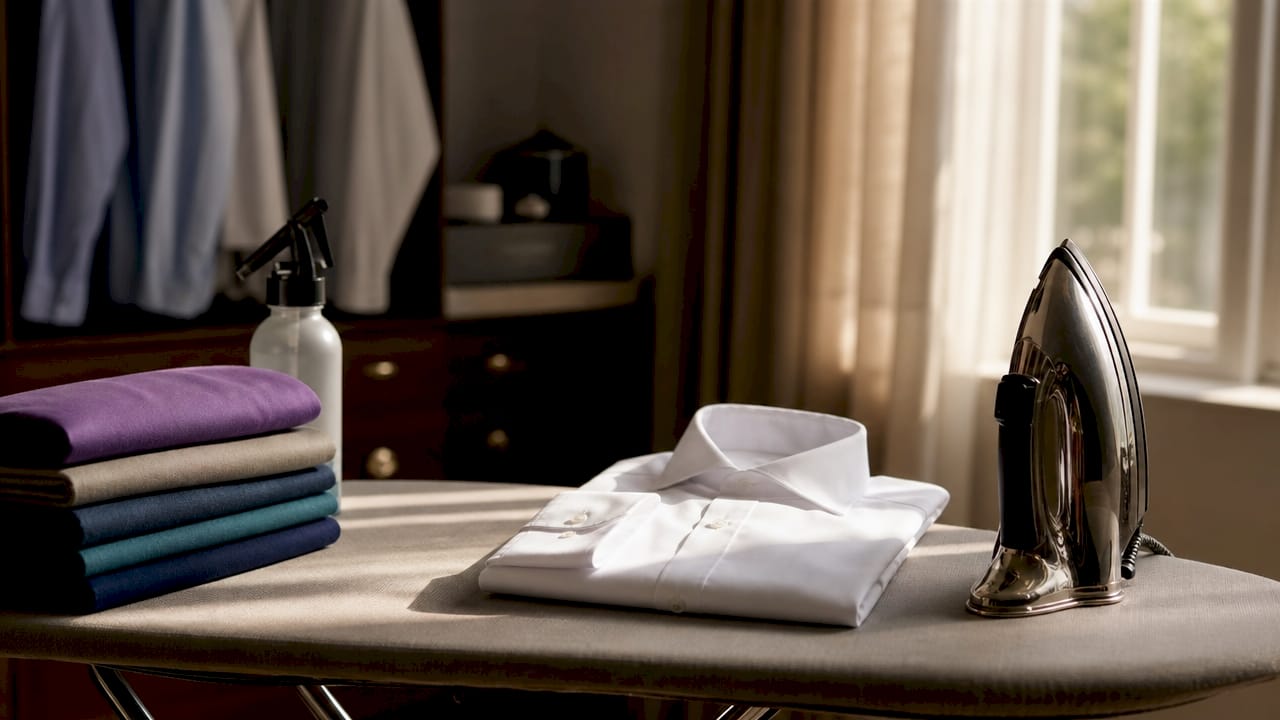
The right equipment separates a flat, crisp finish from a wrinkled, shiny mess. You do not need a professional laundry setup, but you do need tools that perform at a level matching your shirts.
The non-negotiables:
- Steam iron with adjustable temperature: A model with at least 1,500 watts and a precision tip gives you control over heat-sensitive areas near buttons and seams. Rowenta and Reliable are two brands professionals consistently trust for consistent steam output.
- Ironing board with a padded cover: A firm, well-padded surface prevents fabric from bunching and gives you a clean pressing plane. Thin covers cause uneven pressure and leave marks.
- Distilled water: Tap water deposits mineral buildup inside your iron over time, clogging steam vents and leaving brown stains on white shirts. Distilled water eliminates that problem entirely.
- Pressing cloth: A thin cotton or muslin cloth placed between the iron and your shirt protects delicate blends from scorching. A pressing cloth prevents fabric scorching and reduces shiny iron marks on high-end blends.
- Spray bottle: Lightly misting a dry shirt before ironing restores the slight dampness that makes cotton fibers respond to heat more effectively.
Optional but worth having:
Spray starch adds body and crispness to dress shirts, particularly for 100% cotton. Use it sparingly. Heavy starch application builds up on the iron’s soleplate and can weaken cotton fibers with repeated use.
Pro Tip: Fill your iron with distilled water the night before and leave it standing upright. This prevents mineral deposits and means your iron is ready to produce clean steam from the first pass.
The shirt itself is also part of your toolkit. Supima cotton fibers are 50% longer than standard cotton, which means they resist wrinkling and maintain a smoother surface before you even pick up the iron. Starting with a quality fabric reduces the effort required to achieve a professional finish.
How to iron a dress shirt like a pro: step by step
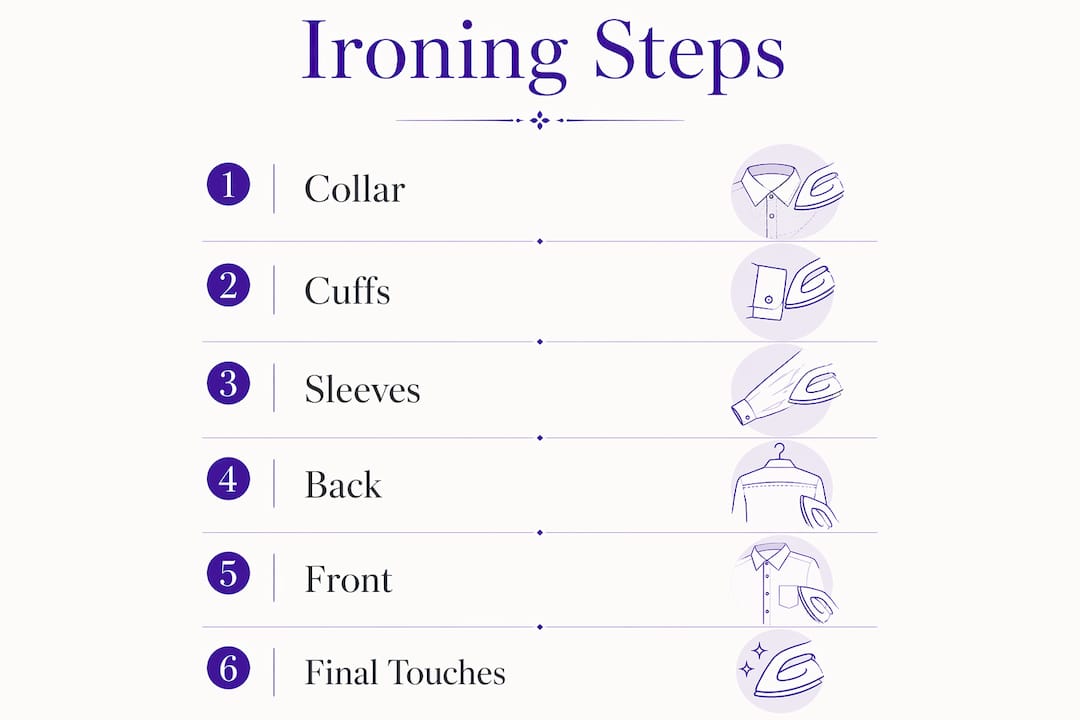
Sequence matters more than most people realize. Ironing in the wrong order means you crease sections you already pressed. Follow this order every time and you will cut your ironing time while improving your results.
-
Set the correct temperature. Check your shirt’s care label. Cotton requires higher heat, typically the “cotton” setting on your iron. Blends and synthetic fabrics need lower heat to avoid shine or melting. Always start slightly lower and increase if needed.
-
Iron the collar first. Lay the collar flat and open. Start at collar edges working inward toward the center to prevent creases near the collar points. Iron the underside first, then flip and press the top side. This is the most visible part of your shirt. Give it the most attention.
-
Press the cuffs. Unbutton each cuff and lay it flat. Iron the inside first, then the outside. Work around the buttons using the iron’s precision tip rather than pressing directly over them. Buttons crack under direct iron pressure.
-
Iron the sleeves. Lay each sleeve flat on the board, aligning the seams. Smooth sleeves by hand before pressing, then iron from cuff to shoulder. Flip the sleeve and repeat on the other side. This prevents a double crease line running down the sleeve.
-
Handle the back panel. Drape the shirt over the narrow end of the ironing board. Work from one shoulder seam across the back, then reposition for the other side. Use short, firm strokes rather than long dragging motions that stretch the fabric.
-
Iron the front panels. Start with the button placket, using the iron’s tip to press between each button. Then move across the front panels. Keep the iron moving to avoid heat concentration in one spot.
-
Finish with the front collar edges. After pressing the body of the shirt, fold the collar down and give the outer edges a final light press. This sets the collar’s shape for the day.
Pro Tip: Hang the shirt immediately after ironing. Draping it over a chair or leaving it on the board for even two minutes allows new wrinkles to form as the fabric cools in a folded position.
Controlled steam pressure around 7.4 bars relaxes collar fibers without stressing the internal lining, which avoids the stiff or overworked appearance that signals amateur ironing. Short steam bursts work better than holding the steam button continuously.
How does fabric choice affect your ironing results?
Fabric is the variable most professionals overlook. Two shirts ironed with identical technique will look completely different if one is made from premium long-staple cotton and the other from a commodity blend.
Premium long-staple cotton resists wrinkling and fraying better than lower-quality cotton, which means less time ironing and a finish that lasts longer into the workday. Supima cotton, grown exclusively in the United States, produces a tighter weave that holds a pressed crease better than Egyptian cotton alternatives at similar price points.
No-iron and wrinkle-free shirts have become standard in professional wardrobes, but they require specific care to maintain their finish:
- Remove shirts from the dryer immediately after the cycle ends. Leaving them sitting in a warm drum for even 10 minutes causes set-in wrinkles that defeat the no-iron treatment.
- Hang them on a quality hanger right away. Wire hangers distort shoulder shape over time.
- Wrinkle-free shirts still need occasional touch-ups on collars and cuffs. Use a cool iron or a handheld steamer rather than a hot iron, which can break down the chemical finish that makes the fabric wrinkle-resistant.
- Avoid heavy starch on no-iron shirts. Starch interacts poorly with the fabric’s treatment and can cause flaking or uneven texture after washing.
“Premium fiber quality is often underestimated but significantly reduces daily maintenance effort and extends garment life.” The professionals who invest in quality shirts at the start spend far less time maintaining them over a year.
Moisture-wicking finishes found in many modern professional dress shirts also affect how the fabric responds to heat. These finishes can break down under excessive iron temperatures, so always verify the care label before pressing synthetic-blend shirts.
What ironing mistakes do professionals make most often?
Even experienced professionals repeat the same errors that shorten shirt life and undercut their appearance. Knowing what to avoid is as useful as knowing the correct technique.
Starting the collar from the center. This pushes fabric outward toward the collar points and creates a crease line that cannot be removed without re-wetting the collar. Always work from the outer edges inward.
Using excessive heat or prolonged steam on fused collar areas. Excessive heat near fused collars causes bubbling in the interlining. Once the interlining bubbles, the collar cannot be restored. Use steady, controlled heat with short steam bursts and keep the iron moving.
Ironing a completely dry shirt. Dry cotton fibers resist heat and require more passes to achieve a crisp result. A slightly damp shirt responds to heat faster, which means less time with the iron on the fabric and a sharper finish.
Pressing directly over buttons and seams. Direct iron contact over buttons causes cracking and leaves shiny marks on the fabric around seams. Use the precision tip to work around buttons and place a pressing cloth over seams on high-end shirts.
Neglecting iron maintenance. A dirty soleplate or clogged steam vents leave brown stains on white shirts and produce uneven steam. Clean the soleplate monthly with a commercial iron cleaner or a paste of baking soda and water. Flush the steam chamber with distilled water regularly.
Choosing home ironing over professional dry cleaning also extends shirt lifespan by reducing overall chemical exposure. Dry cleaning 20 shirts monthly at $1 per shirt costs around $240 yearly. That figure does not account for the cumulative fabric damage that repeated dry cleaning causes to fine cotton.
Key takeaways
Ironing dress shirts professionally requires the right sequence, controlled steam, and quality fabric to produce a finish that holds through a full workday.
| Point | Details |
|---|---|
| Sequence determines results | Iron collar first, then cuffs, sleeves, back, and front panels to avoid re-creasing pressed sections. |
| Steam control protects fabric | Use short steam bursts at controlled pressure rather than continuous steam to avoid bubbling fused collar linings. |
| Fabric quality reduces effort | Supima cotton and premium long-staple fibers resist wrinkling and hold a pressed finish longer than standard cotton. |
| No-iron shirts still need care | Remove wrinkle-free shirts from the dryer immediately and hang them to preserve their chemical finish. |
| Iron maintenance matters | Clean the soleplate monthly and use distilled water to prevent stains and uneven steam output. |
What I’ve learned from years of pressing shirts the right way
I spent years treating ironing as a chore to finish as fast as possible. The result was shirts that looked fine at 8 a.m. and tired by noon. The shift happened when I stopped rushing the collar and started treating it as the focal point of the entire shirt, because it is. Every person you meet looks at your collar and cuffs first. Those two areas are worth 60% of your ironing time.
The home versus professional service debate is real, but I think most professionals frame it wrong. Professional laundering delivers consistency, which matters when you have 15 shirts rotating through a weekly schedule. But it also means surrendering control over heat settings and starch levels. I use professional services for my most formal shirts and iron everything else myself. That split gives me the best of both approaches without the full cost of outsourcing.
The single biggest upgrade I made was switching to shirts built from quality long-staple cotton. The difference in ironing ease is not marginal. A well-constructed shirt takes half the time to press and holds the result twice as long. That is not a small return on a wardrobe investment.
Batch ironing on Sunday evening, five or six shirts at once, also changes the math entirely. You heat the iron once, get into a rhythm, and finish the week’s shirts in under 45 minutes. Doing one shirt at a time every morning costs you more total time and more mental energy.
— Giuseppe
Dress shirts worth ironing: what Moreciandco offers
The technique only works as well as the shirt you start with. Moreciandco is built on the principle of getting what you pay for, which means every shirt in the collection is made to hold a press, survive a workweek, and look sharp without constant maintenance. The Complesso Collection features premium easy-care fabrics designed specifically for professionals who need their wardrobe to perform as hard as they do. If you are building or upgrading a professional wardrobe, start at Moreciandco and invest in shirts that reward the effort you put into pressing them.
FAQ
What is the correct order to iron a dress shirt?
Start with the collar, then move to the cuffs, sleeves, back panel, front panels, and finish with the collar edges. This sequence prevents re-creasing sections you have already pressed.
Do wrinkle-free dress shirts still need ironing?
Wrinkle-free shirts require occasional touch-ups on collars and cuffs. Remove them from the dryer immediately and hang them to maintain their finish, using a cool iron or steamer for any remaining creases.
What temperature should I use to iron a cotton dress shirt?
Use the cotton setting on your iron for 100% cotton shirts, which is typically the highest heat setting. For blends, start at a lower temperature and increase gradually to avoid shine or fabric damage.
How do I avoid shiny marks when ironing dress shirts?
Use a pressing cloth between the iron and the fabric, especially on high-end blends and around seams. The iron’s precision tip navigates around buttons without direct contact that causes cracking or shine.
Is home ironing better than professional dry cleaning for dress shirts?
Home ironing extends shirt lifespan by reducing chemical exposure from dry cleaning. Professional services offer consistency for formal shirts, but regular home ironing with proper technique costs less and causes less cumulative fabric damage.